最近有不少用户反应,自己电脑遇到问题重装win7系统之后,发现自己的电脑根本无法连接网络,而且网线是正常插着的,这要怎么办呢?下面小编就带这大家一起看看具体怎么解决吧!
操作方法:
1、打开开始菜单,点击“控制桌面”

2、点击“网络和Internet”

3、点击“网络和共享中心”

4、点击左侧的“更改适配器设置”

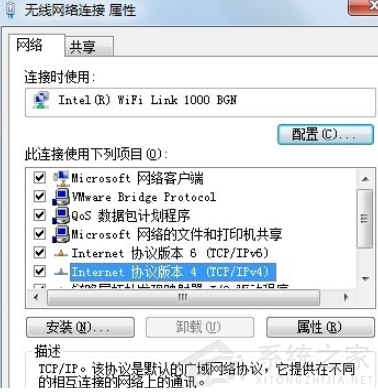
5、右击“无线网络连接”,选择“属性”

6、在属性窗口中选中“Internet协议版本4”,然后点击下方的属性
7、选择自动获得IP地址,自动获得dns服务器地址

以上就是win7重装系统后不能上网的解决方法,希望能为大家提供帮助。
